Project:
Lyn Astrology
Date:
Aug 2026
Prerequisites
My wife asked me to assist her with creating an online course. She had ~13 presentations that needed to be styled. Styling all the slides manually would yield better results, but take a lot of time which I didn’t have at that moment, and thought that this is the opportunity to battle-test a pipeline idea I had in mind. I styled the very first presentation manually — 13 slides in total, and it is going to be used as a reference material.
Initial Setup
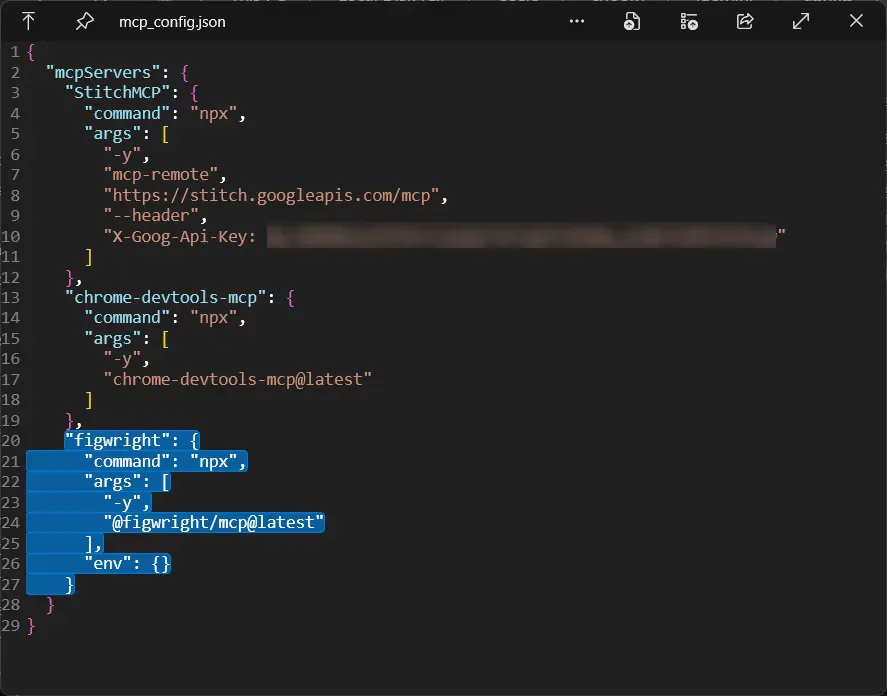
Official Figma MCP has limits on calls. Using it would mean that aside from the AI provider limits, I would be also bound by Figma MCP limits, which is suboptimal. To evade these kinds of limitations, several people concocted dedicated tools, all of which do essentially the same thing: convert AI agent MCP calls into Figma API calls. Examples: Figmosha, Figwright. All of these add-ons require modifying configuration JSON of your AI agent harness either locally or globally and setting up a Figma plugin.
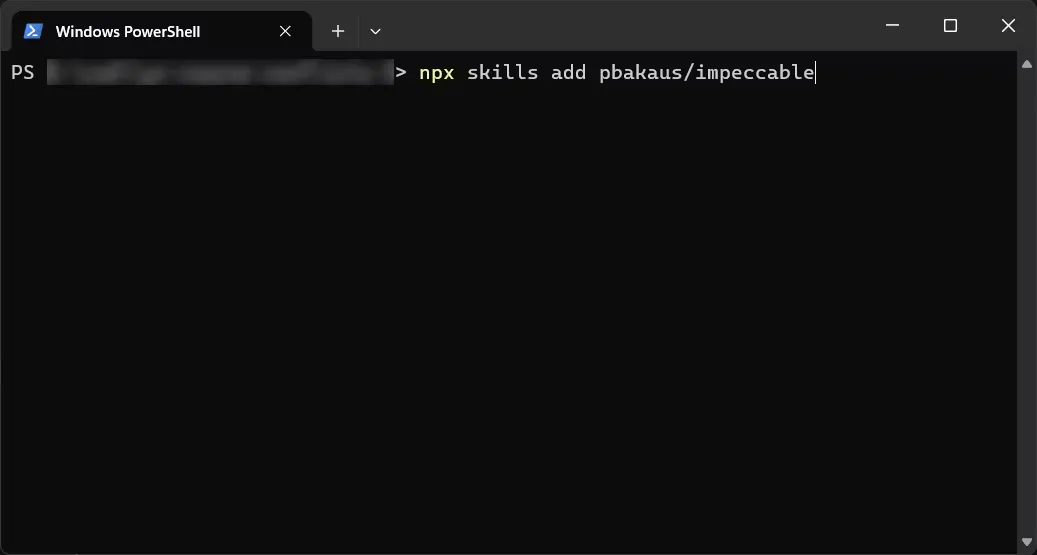
Just to make sure the agent will be thorough in extracting the design tokens I am installing the glorified markdown file everyone uses. Installing this locally because I don’t want the agent to choke his context window when doing tasks not related to design.
How to tell the agent where to look at inside the Figma file? Point to a node ID of the frame. Node IDs are all parts of the URL of the frame, but copying them manually would be an unnecessary chore. There are plugins that do exactly that — copy a node ID of selected frames. I am using and recommending this one.
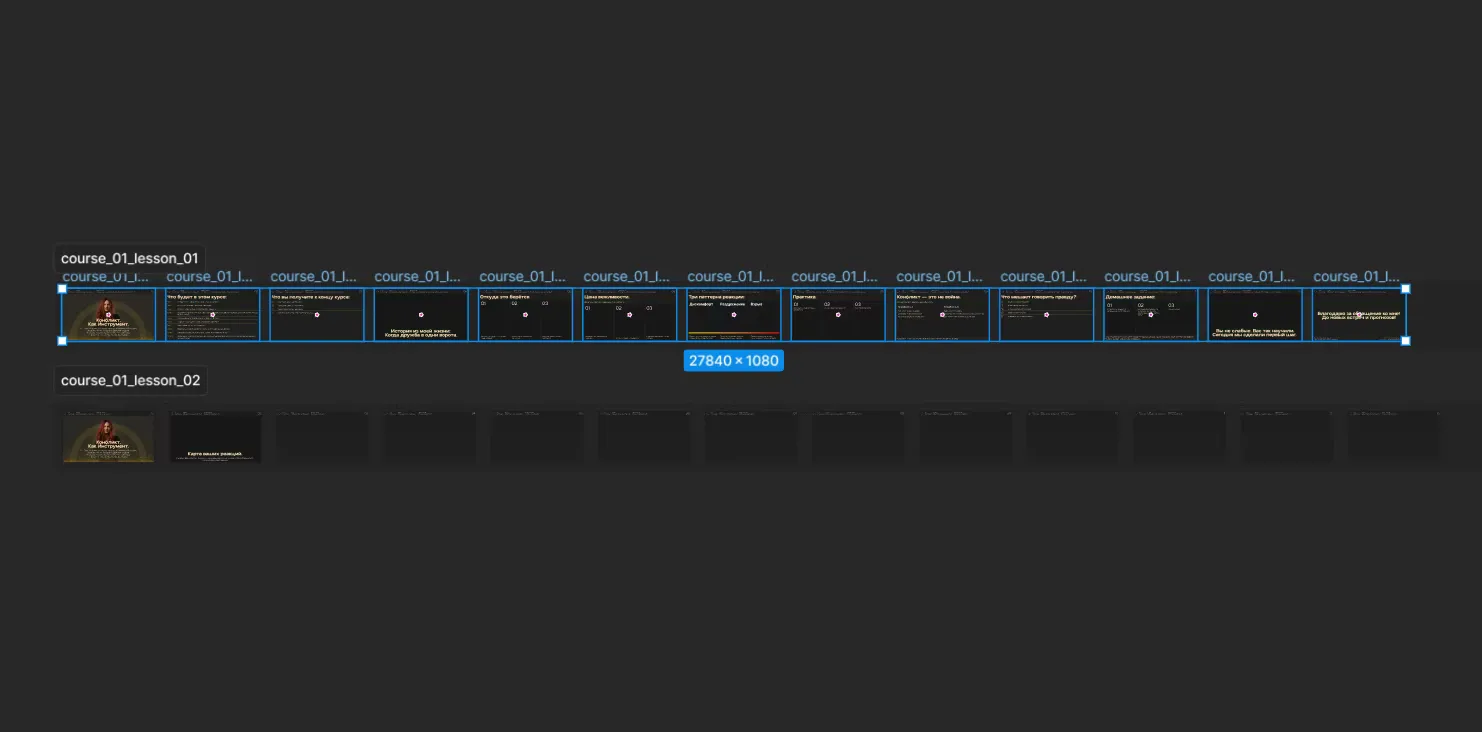
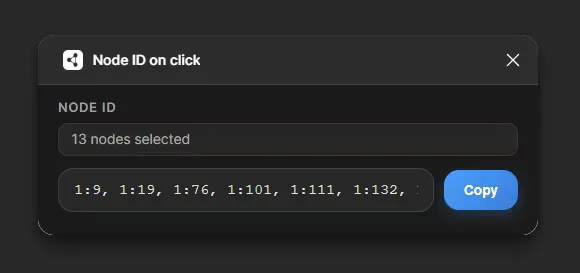
Selecting the frames which are going to be analyzed for design token distillation it is time to run the agent, using the prompt that utilizes the Impeccable skill.
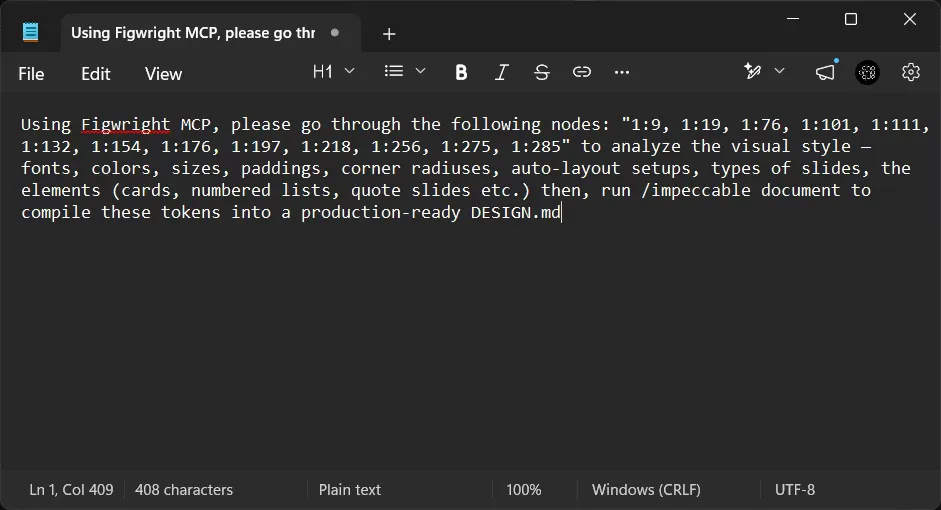
After around 5 minutes of work, we have a formulated style guide to make sure the subsequent designs won’t drift from the visual style too much.
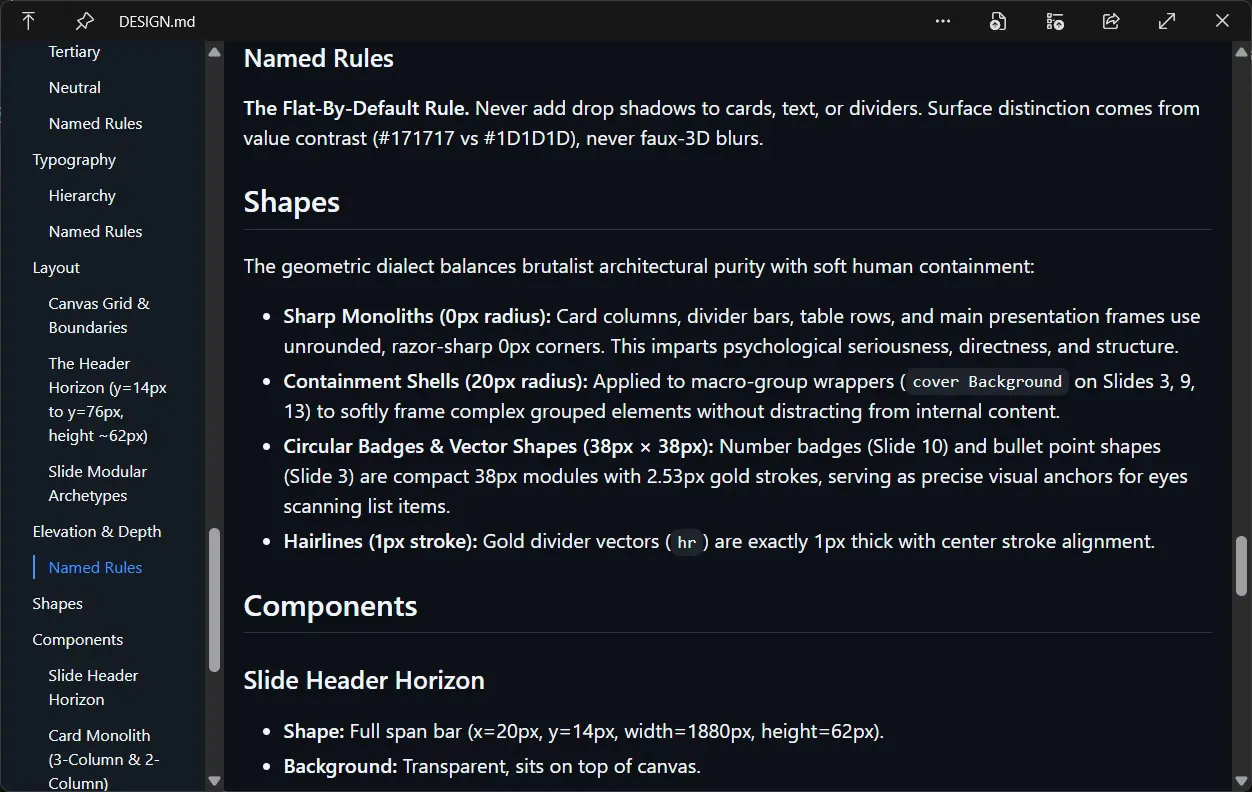
Layout Generation
Armed with the style guide the agent can now be asked to generate the next presentation with an uncomplicated prompt like this:
Using Figwright MCP please design the layout for the following nodes 2005:3, 2005:23, 2005:30, 2005:37, 2005:44, 2005:51, 2005:58, 2005:65, 2005:72, 2005:79, 2005:86, 2008:100 using text from the "./course_01_lesson_2_of_10.pptx" file.After around 10 minutes of working we can observe the result:
Imagery Generation And Processing
The best way to generate an image for free (provided you have the hardware) is to use ComfyUI with open weights models, and there are open weights models that offer quite high generation quality — Flux, Krea, QwenImage. I instlled ComfyUI desktop AMD ROCm version to be able to utilize the hardware potential.
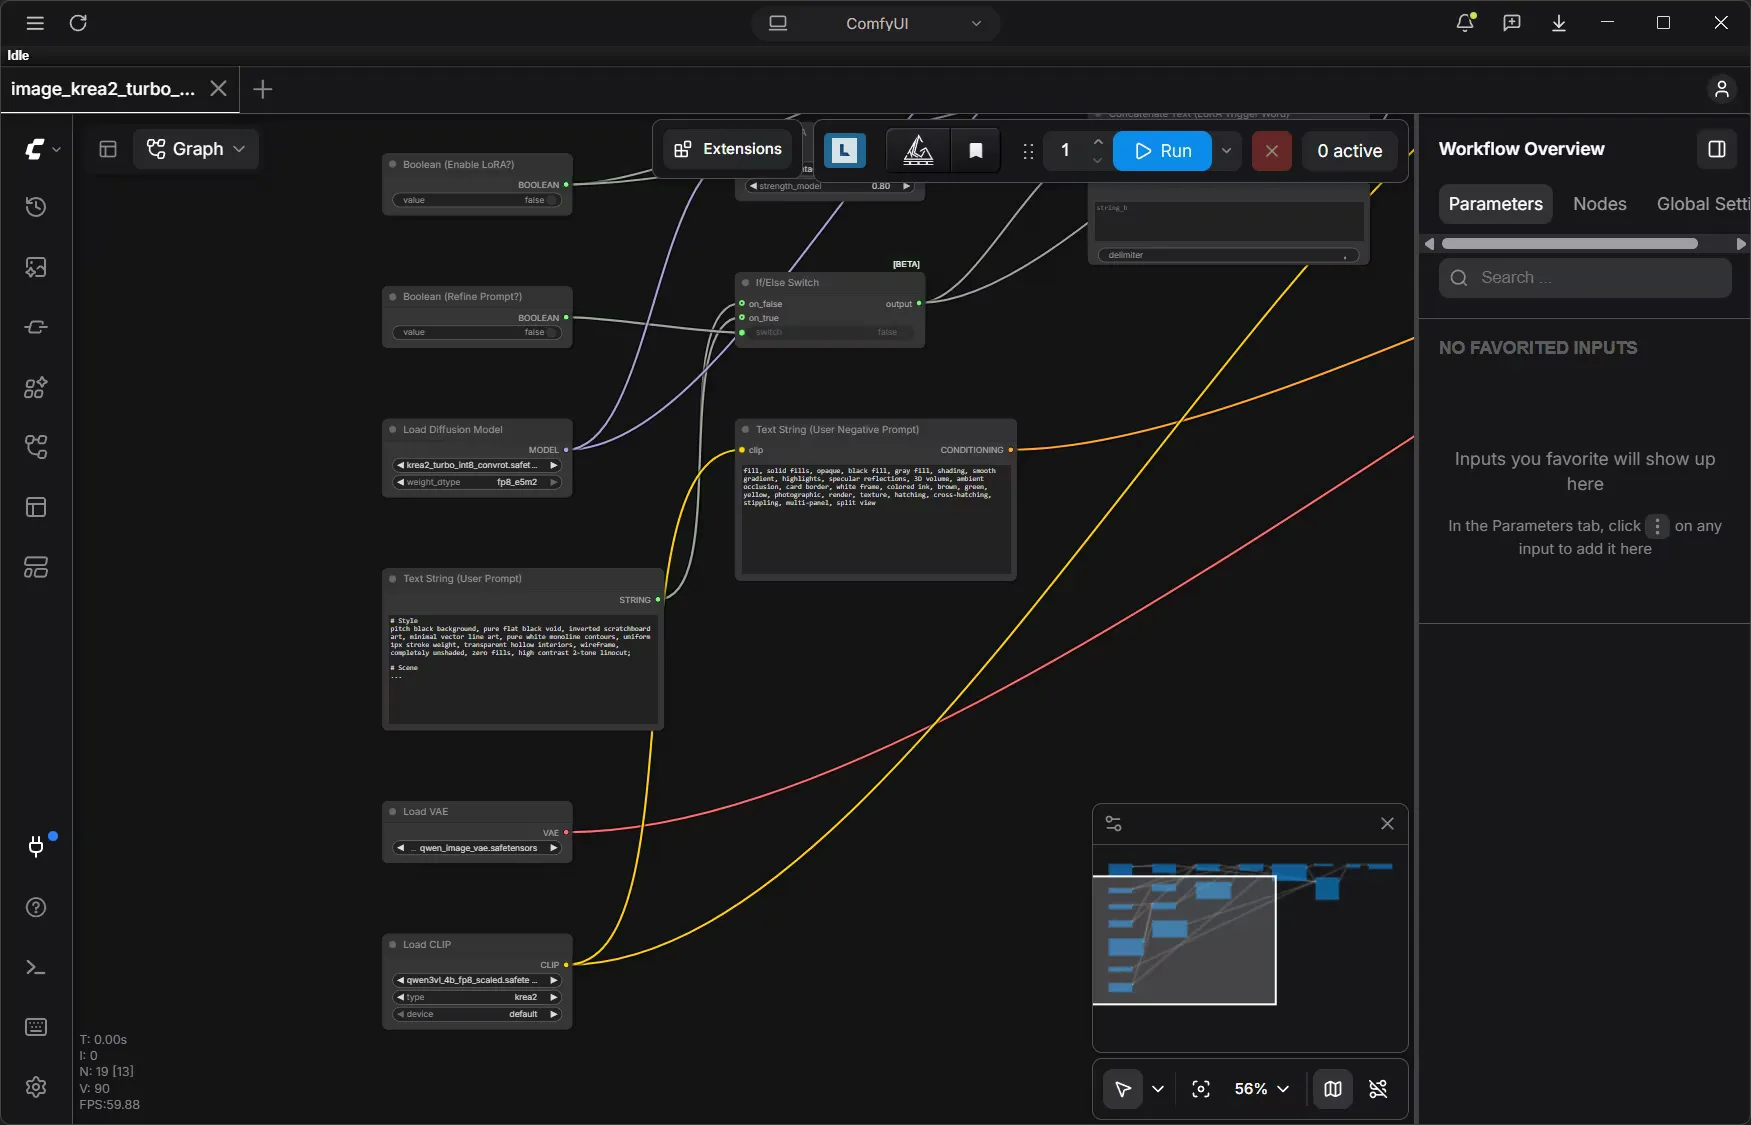
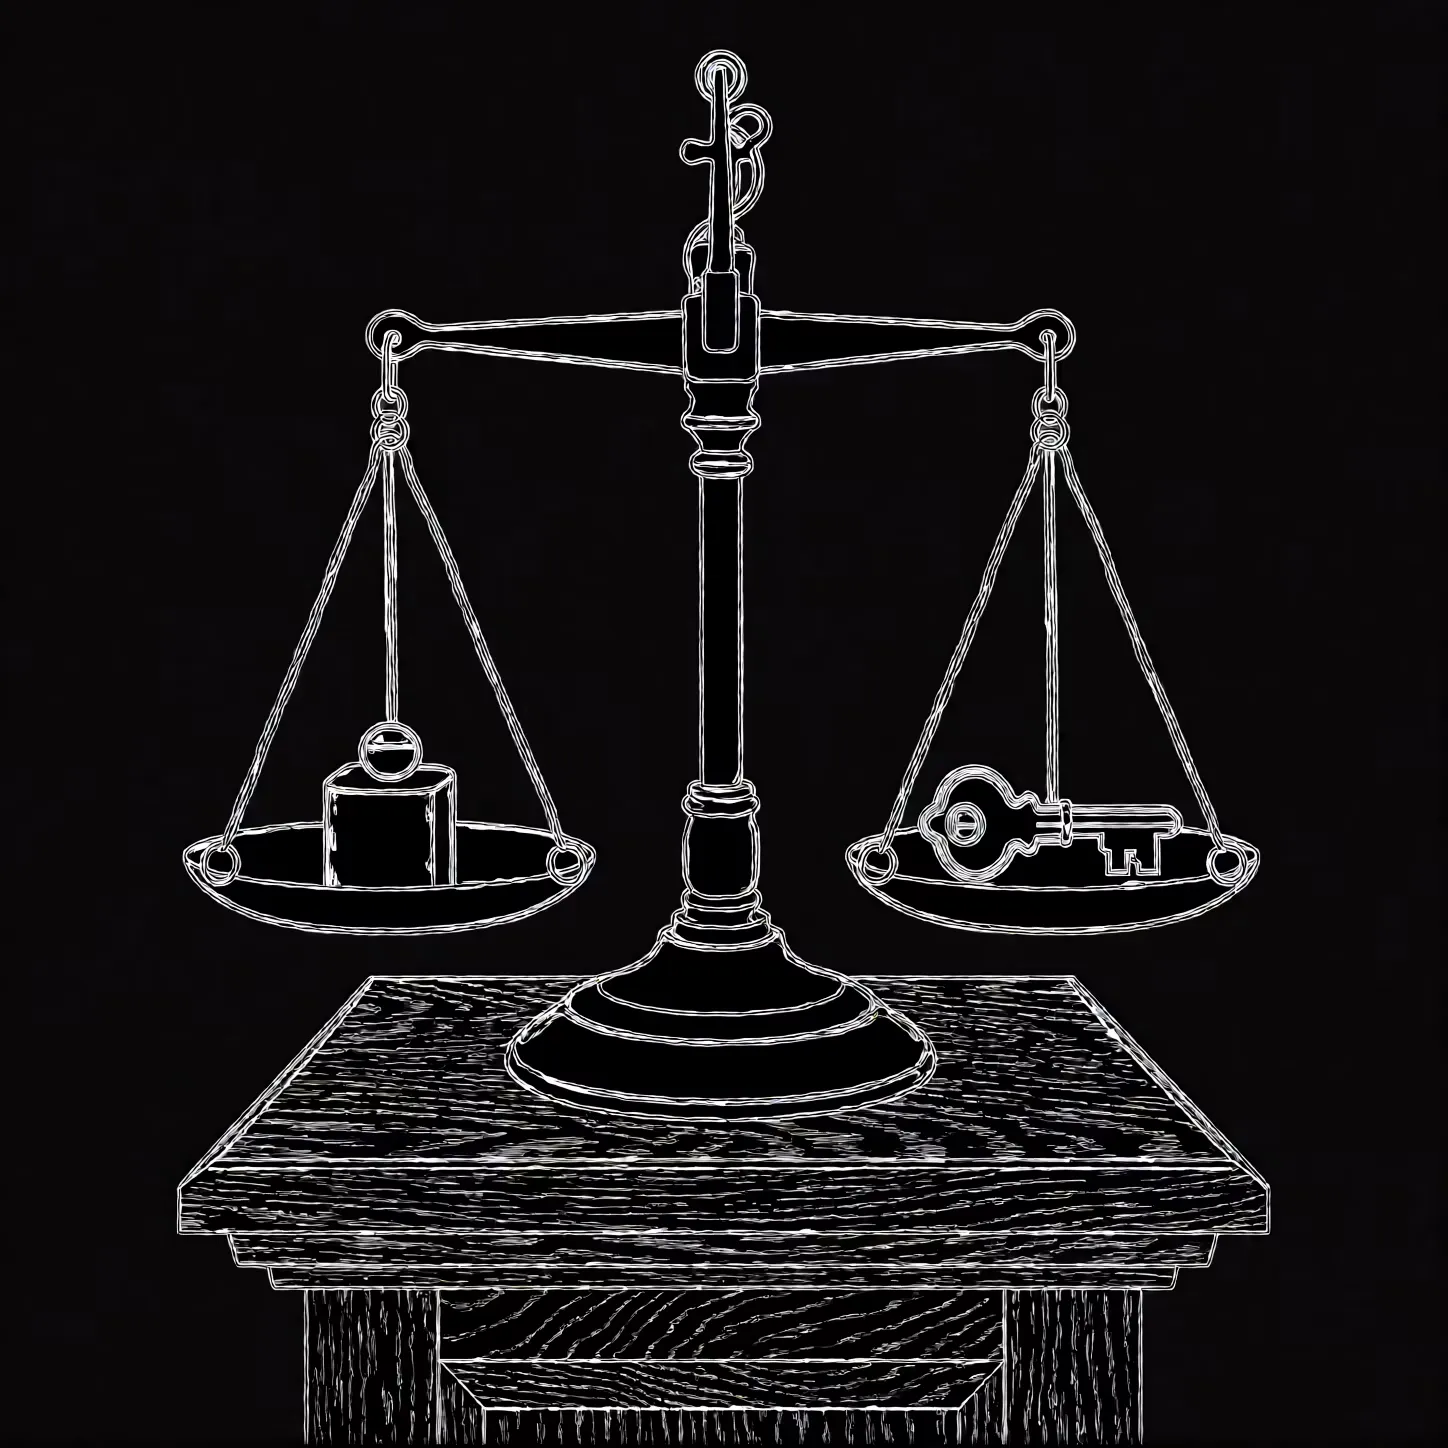
Testing all of these open weights models with their respective flow, I chose Krea2Turbo because it nailed the art style the most.
# Style
pitch black background, pure flat black void, inverted scratchboard art, minimal vector line art, pure white monoline contours, uniform 1px stroke weight, transparent hollow interiors, wireframe, completely unshaded, zero fills, high contrast 2-tone linocut;

# Scene
...
With the base style figured out, the next obstacle is how to apply that golden gradient to fit the color style of the presentation?
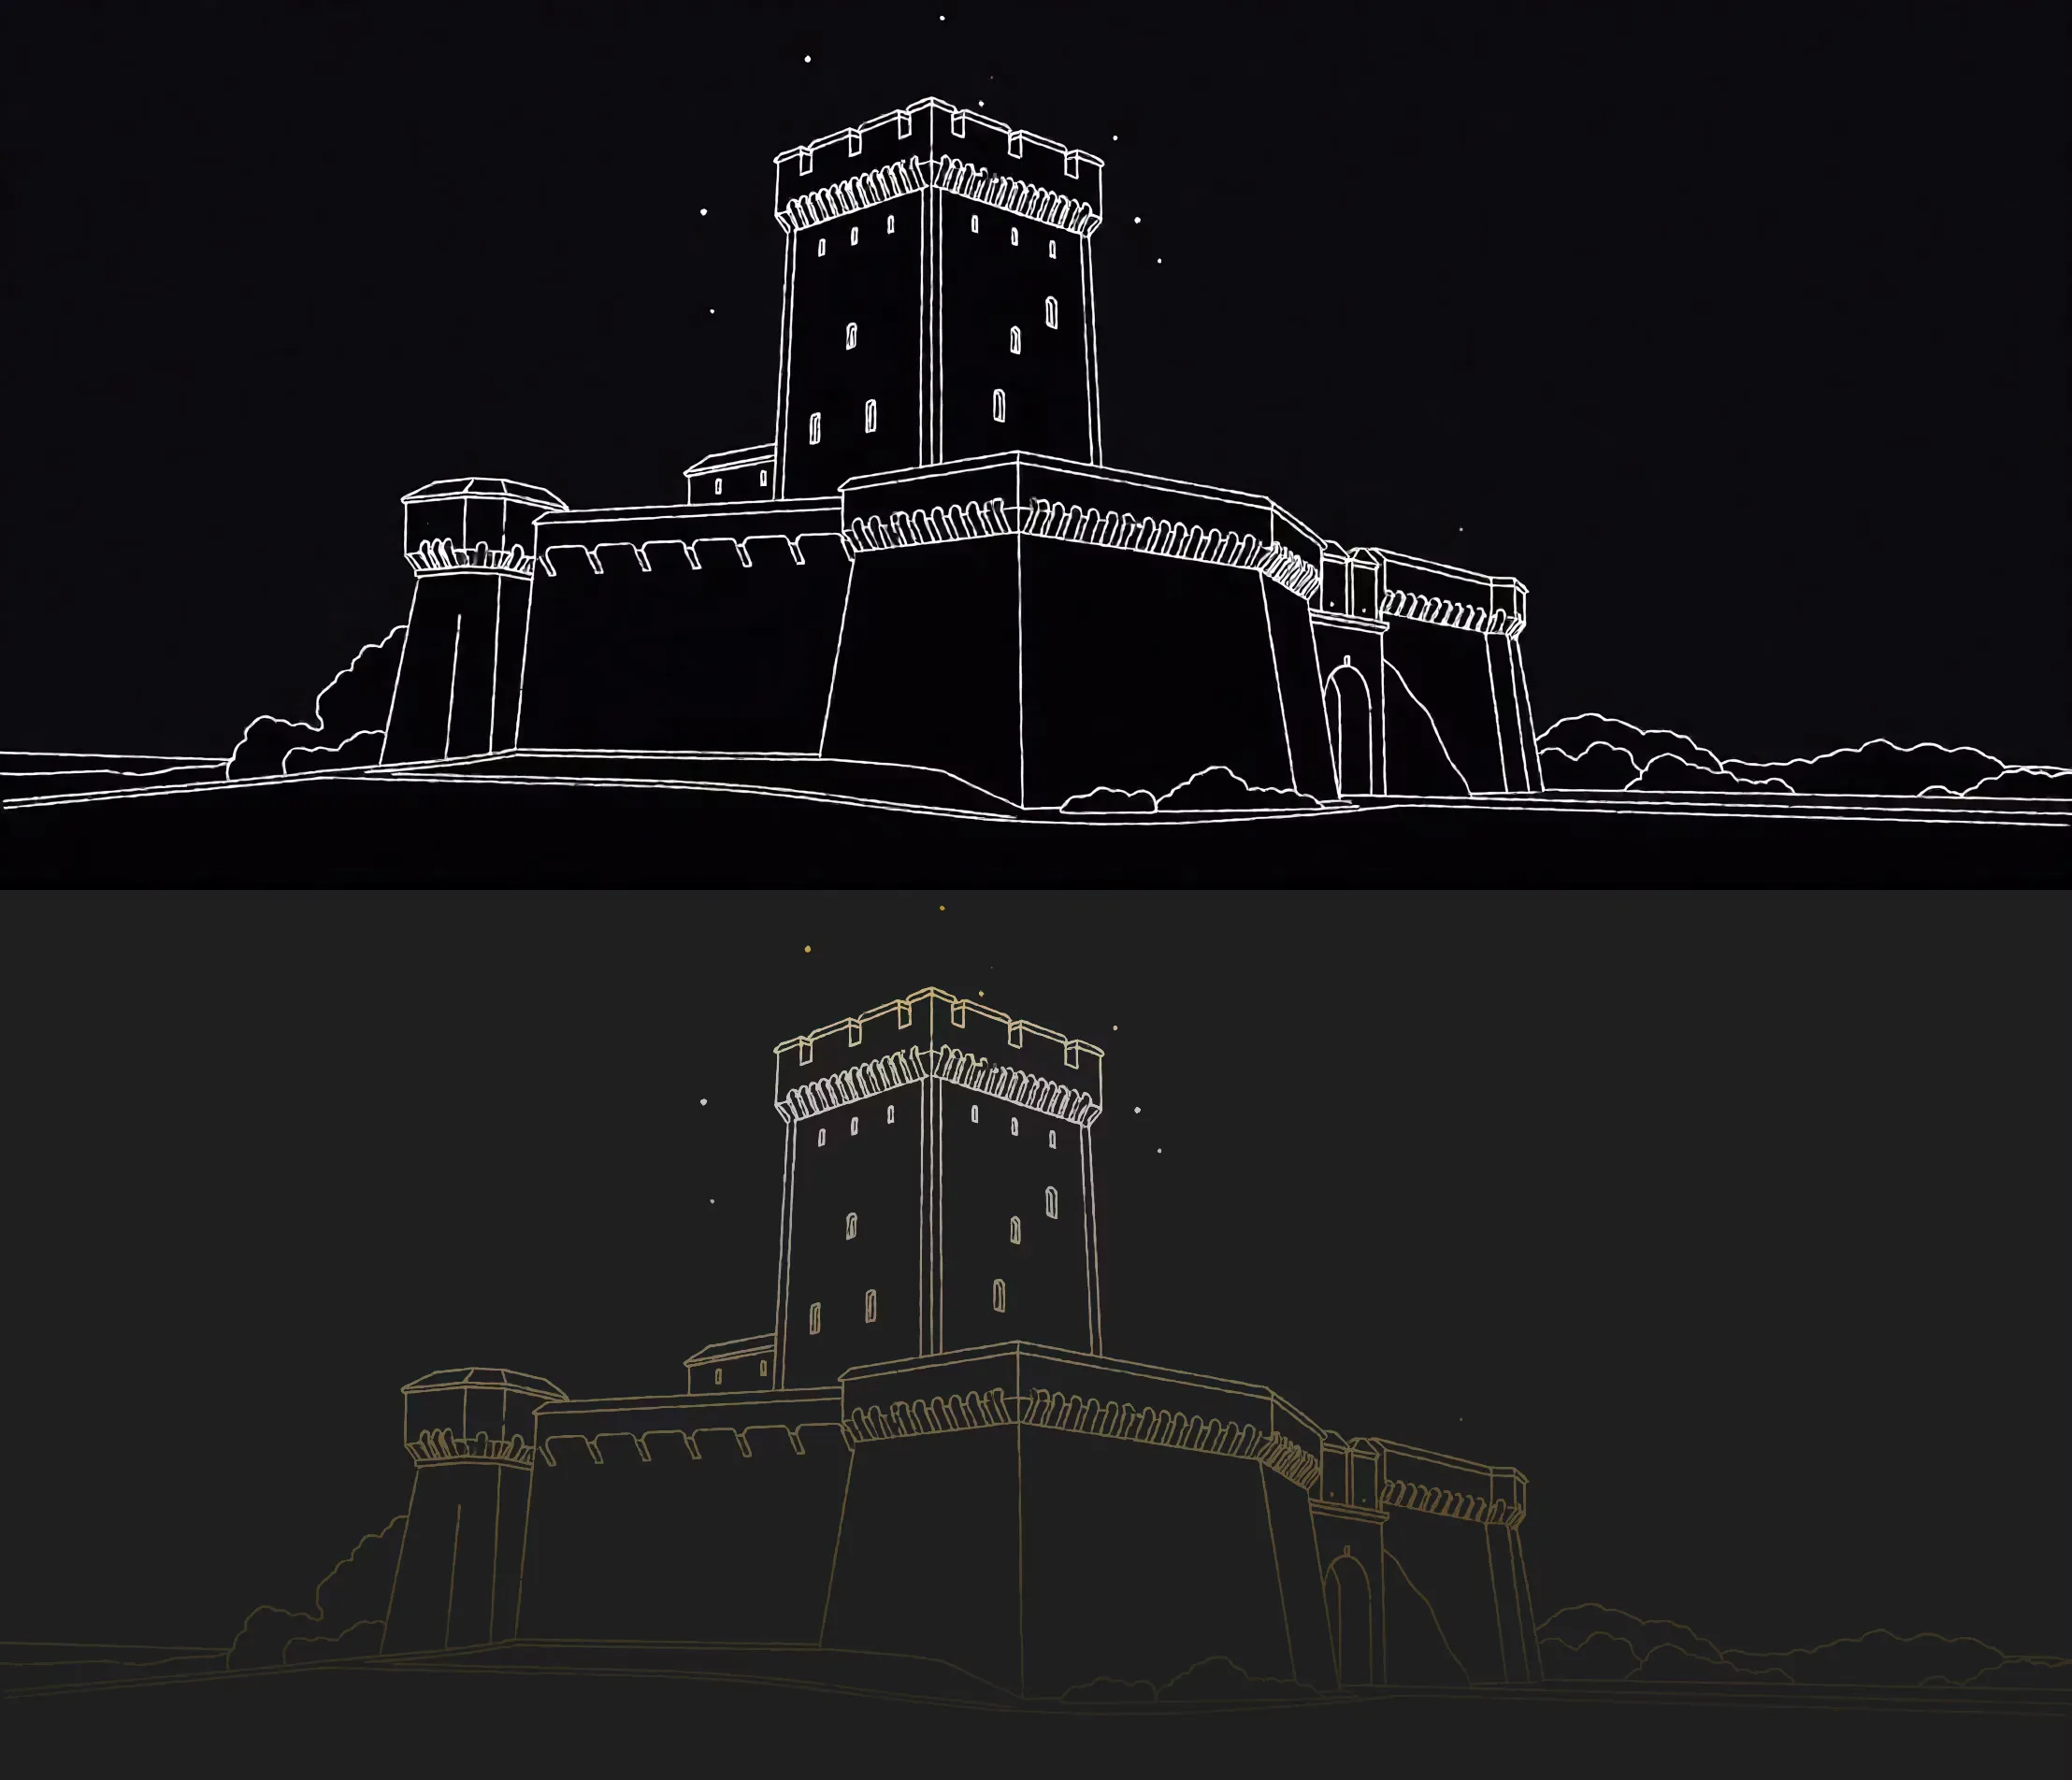
One way involves recording a macro in Affinity and running a batch process to all the images at once, but that would later involve manual seeking, matching and pasting 70+ images scattered across the slide. Or using open source alternatives like Krita which has MCP server freely available. However, I have found that the most automation-friendly way is to utilize a python library called “pillow” which can absolutely replicate most of the things in Affinity (the ones you could macro).
So I asked Agy to make me a python script that replicates the processing chain I do in Affinity sans its quirks:
Please create a python script that uses the Pillow image processing library, it should do the following manipulations to the image:

1. Desaturate the image so it will be monochromatic;
2. Convert black (#000) to an alpha channel;
3. Apply a gradient fill that in CSS is written like this 'linear-gradient(#FBC75A 0%, #FFFFFD 25%, #E6AD44 75%, #BA8A22 100%);';
4. Apply gradient mask: the image should have 100% opacity at the top and 30% opacity at the very bottom;
5. Encode an save the image with .webp extension.
...
After some testing and rewrites I saved the final version I was satisfied with bw_alpha_goldenize.py into the project folder. With all the pieces ready it is time to asseble.
Pipeline Assembly
Inside the Krea2Turbo flow ComfyUI, in the Resolution Selector node, the aspect ratio selector has limited array of values.
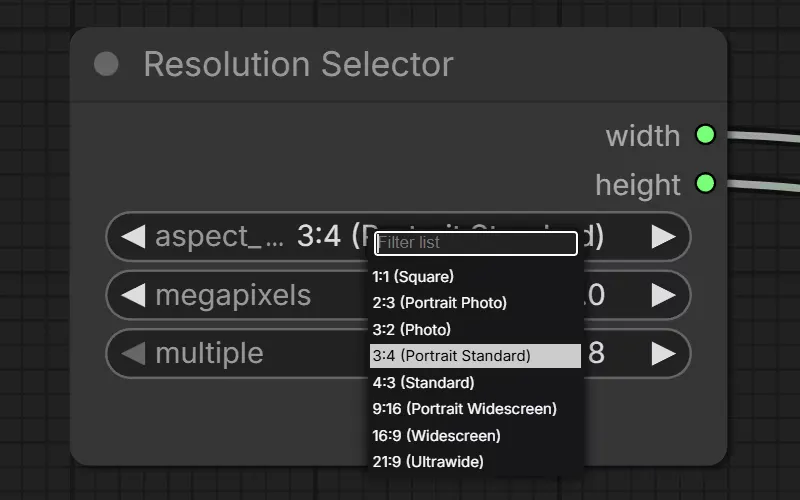
In the Figma file, I have selected all the nodes into which the image is going to be added and copied the nodes IDs and asked Agy this:
Here is a list of nodes:

1:374, 1:409, 1:412, 1:415, 1:443, 1:446, 1:449, 1:508, 1:539, 1:577, 1:589, 1:592, 1:606, 1:609, 1:612, 1:624, 1:627, 1:630, 1:641, 1:667, 1:670, 1:673, 1:676, 1:689, 1:692, 1:695, 1:707, 1:742, 1:745, 1:748, 1:759, 1:788, 1:1113, 1:1124, 1:1134, 1:1136, 1:1138, 1:1150, 1:1153, 1:1156, 1:1167, 1:1302, 1:1321, 1:1352, 1:1385, 1:1422, 1:1425, 1:1428, 1:1439, 1:1473, 1:1502, 1:1537, 1:1540, 1:1543, 1:1576, 1:1579, 1:1582, 1:1585, 1:1588, 1:1599, 1:1630, 2:21, 2:48, 2:51, 2:54, 2:57, 2:107, 2:109, 2:114, 2:117, 2:198, 2:201, 2:204, 2:217, 2:220, 2:223, 2:235, 2:266, 2:306, 2:318, 2:322, 2:336, 2:339, 2:342, 2:345, 2:399, 2:423, 2:426, 2:429, 2:441, 2:469, 2:522, 2:562, 2:574, 2:577, 2:580, 2:705, 2:739, 2:743, 2:747, 2:761, 2:765, 2:769, 2:782, 2:843, 2:883, 2:895, 2:898, 2:901, 2:957, 2:960, 2:963, 2:982, 2:1431, 2:1650, 2:1824, 2:1827, 2:1830, 2:1833, 2:1841, 2:1854, 2:1896, 2:2022, 2:2025, 2:2028, 2:2171, 2:2182, 2:2224, 2:2234, 2:2237, 25:15, 25:227, 26:388, 26:402, 26:410, 26:421, 26:437, 26:438, 26:456, 26:457, 26:458, 26:459, 26:492, 26:493, 26:494, 26:506, 26:507, 26:508, 26:545, 26:546, 26:547, 26:559, 26:560, 26:561, 26:573, 26:574, 26:575, 26:576, 26:609, 26:610, 26:619, 26:620, 26:621, 26:643, 26:644, 26:645, 26:675, 26:676, 26:677, 26:691, 26:692, 26:693, 26:694

1. Using Figwright MCP, select the first node in the list;
2. Get the node height and width values;
3. Calculate the aspect ratio of the node;
4. Compare the calculated aspect ratio value with the array of the following aspect ratios: "1:1 (Square)", "3:4 (Portrait Standard)", "4:3 (Standard)", "16:9 (Widescreen)", "21:9 (Ultrawide)", and chose one value from this array that is the closest to the node's calculated aspect ratio value the most;
5. Open the file "aspect_ratios.txt" and you will see the 5 strings separated by line breaks:

Node Group A (1:1 - "1:1 (Square)"):


Node Group B (3:4 - "3:4 (Portrait Standard)"):


Node Group C (4:3 - "4:3 (Standard)"):


Node Group D (16:9 - "16:9 (Widescreen)"):


Node Group E (21:9 - "21:9 (Ultrawide)"):

;
6. Write down the node ID under the contextually matching string;
7. Go to the next node in the list and repeat this process for all the nodes.

Node IDs should be separated by commas. Example:

Node Group A (1:1 - "1:1 (Square)"):
1:409, 1:412, 1:415

Node Group B (3:4 - "3:4 (Portrait Standard)"):
1:1134, 1:1136

Node Group C (4:3 - "4:3 (Standard)"):
1:258, 1:261

Node Group D (16:9 - "16:9 (Widescreen)"):
1:589, 1:592

Node Group E (21:9 - "21:9 (Ultrawide)"):
1:508, 1:539

...
When Agy finished filling the nodes IDs inside the aspect_ratios.txt file I can use it in the pipaline prompt. After refinement the final version of the pipeline prompt looks like this:
Please execute the following automated batch workflow sequentially for each Node ID across the defined groups.

Target Node IDs:

Node Group A (1:1 - "1:1 (Square)"):
1:409, 1:412, 1:415, 1:443, 1:446, 1:449, 1:484, 1:488, 1:492, 1:496, 1:606, 1:609, 1:612, 1:624, 1:627, 1:630, 1:689, 1:692, 1:695, 1:742, 1:745, 1:748, 1:1422, 1:1425, 1:1428, 1:1537, 1:1540, 1:1543, 2:198, 2:201, 2:204, 2:217, 2:220, 2:223, 2:2172, 2:2175, 2:2178, 26:456, 26:457, 26:458, 26:459, 26:573, 26:574, 26:575, 26:576, 57:312

Node Group B (3:4 - "3:4 (Portrait Standard)"):
1:1134, 1:1136, 1:1138, 1:1150, 1:1153, 1:1156, 2:48, 2:51, 2:54, 2:57, 2:336, 2:339, 2:342, 2:345, 2:895, 2:898, 2:901, 2:2022, 2:2025, 2:2028, 2:2183, 2:2186, 2:2189, 1:1576, 1:1579, 1:1585, 1:1588

Node Group C (4:3 - "4:3 (Standard)"):
1:258, 1:261, 1:264, 1:462, 1:465, 1:468, 1:471, 1:1555, 1:1558, 1:1561, 1:1564, 2:423, 2:426, 2:429, 2:479, 2:482, 2:485, 2:488, 2:574, 2:577, 2:580, 2:957, 2:960, 2:963, 2:1842, 2:1845, 2:1848, 2:1855, 2:1858, 2:1861, 26:492, 26:493, 26:494, 26:506, 26:507, 26:508, 26:545, 26:546, 26:547, 26:559, 26:560, 26:561, 26:619, 26:620, 26:621, 26:643, 26:644, 26:645, 26:657, 26:658, 26:659, 26:660, 1:1283, 1:1286, 1:1289, 1:1303, 1:1306, 1:1309

Node Group D (16:9 - "16:9 (Widescreen)"):
1:589, 1:592, 26:609, 26:610, 26:675, 26:676, 26:677, 26:691, 26:692, 26:693, 26:694, 2:318, 2:322

Node Group E (21:9 - "21:9 (Ultrawide)"):
1:508, 1:539, 1:577, 1:641, 1:707, 1:759, 1:788, 1:1113, 1:1124, 1:1321, 1:1352, 1:1385, 1:1599, 1:1630, 2:21, 2:235, 2:266, 2:306, 2:441, 2:522, 2:562, 2:705, 2:843, 2:883, 2:1431, 2:1650, 2:1896, 2:2121, 2:2234, 2:2237, 25:15, 25:227, 26:388, 26:402, 26:410, 26:438

Workflow Steps:

1. Target Node & Text Extraction:
   - Use Figwright to locate the target frame by its Node ID.
   - Recursively traverse child objects to extract all Russian text content. Ignore standalone numbering tokens (e.g., '01', '02', '03').

2. Metaphor Generation:
   - Translate the core concept of the extracted Russian text into an English visual prompt.
   - Restrict imagery strictly to allegories, technologies, objects, and aesthetics known during or before the Victorian era (pre-1901). Avoid modern elements.
   - Generate purely physical, sensory descriptions of objects and materials.
   - FORBIDDEN: Do not use abstract explanations or metaphorical meaning phrases (e.g., "representing X", "symbolizing Y", "signifying Z", "requesting change", "feelings").
   - FORBIDDEN: Do not use text-implying words (e.g., "engraved", "inscribed", "written", "scroll with message", "labeled", "titled").
   - If describing parchment or scrolls, explicitly specify they are "blank" or "plain".
   - FORBIDDEN: Do not use the words "collection", "study", "series", "diagram", "set", "figures", or "sketches".

3. ComfyUI Dispatch:
   - Load the base workflow payload from "image_krea2_turbo_t2i_int8_2_wnegative_barebone.json" in memory.
   - In node "49" (ResolutionSelector), set `inputs.aspect_ratio` to the preset string matching the active Node Group.
   - In node "66" (Text String / User Prompt), replace everything following "# Scene\n" with the generated Victorian metaphor.
   - In node "72" (KSampler):
     * Set `inputs.seed` to a newly generated random integer.
   - POST the modified JSON payload to `http://127.0.0.1:8189/prompt` and capture the returned `prompt_id`.

4. Output Handling & Post-Processing:
   - Poll `http://127.0.0.1:8189/history/<prompt_id>` until the generation status is completed.
   - Locate the newly generated image filename in `\generated-images`.
   - Run the post-processing script via CLI:
     `python bw_alpha_goldenize.py "generated-images/<filename>"`
   - The script outputs a `.webp` file with the same base name.
   - Use Figwright to place/fill the resulting `.webp` image into the target Figma node.
   - Wait 10 seconds before moving to the next Node ID.
The process will take hours, so it is probably wiser to leave it execute overnight.
The results:
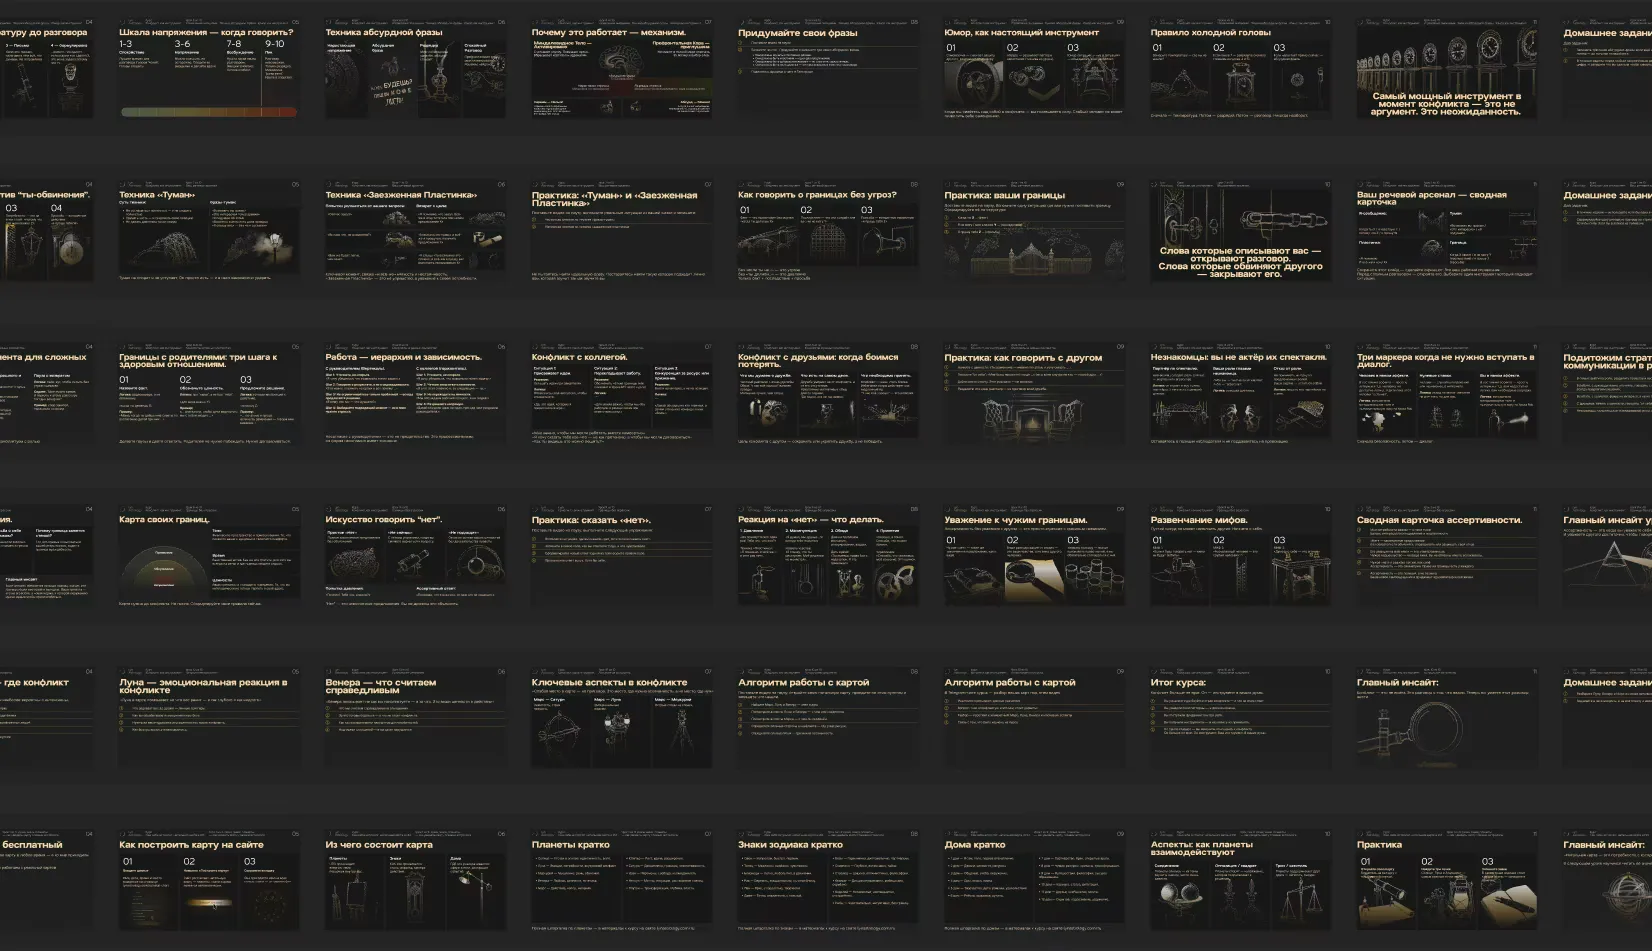
The finishing move would be removing auto-layout from these frames, convert all inner frames to groups using a plugin, send the frames into Figma Slides and save every presentation into a .pptx file.
Notes
There are several caveats I need to address:
- For the pipeline to be fully automated the agent should be run in YOLO mode (harness doesn’t ask for any permissions);
- Default Krea2Trubo pipeline contains an interpreter LLM node that should be deleted or disabled for this pipeline, otherwise a large chunk of the generations would be 2x3 or 2x2 grids with smaller sketches inside, which is suboptimal;
- The generations are in 10% of cases not adhering to the style prompt, resulting in some elements have realistic colors, this is partially masked by the image effects script “bw_alpha_goldenize.py”;
- ComfyUI is especially demanding when running locally, rendering the computer very slow to respond during the pipeline execution, as well as may cause thermal shutdowns, for PC users I would recommend using a specialized tool to underclock/undervolt the PC before starting the pipeline.